Update Asus Motherboard BIOS Using EZ Flash Utility
30 April 2026 / 2 min read
Table Of Content
# Introduction
Updating your motherboard BIOS can improve system stability, add support for new hardware, and fix bugs. ASUS provides a built-in tool called EZ Flash Utility, which makes the process simple and safe without needing for additional software.
In this guide, you’ll learn how to update your ASUS motherboard BIOS step by step using EZ Flash.
# Prerequisites
- A USB flash frive formatted to FAT32. (Otherwise it will no be detected by EZ Flash).
- A UPS (Uninterruptible Power Supply) is recommended. A sudden power loss during the update can brick your motherboard.
# Downloading the Correct BIOS File
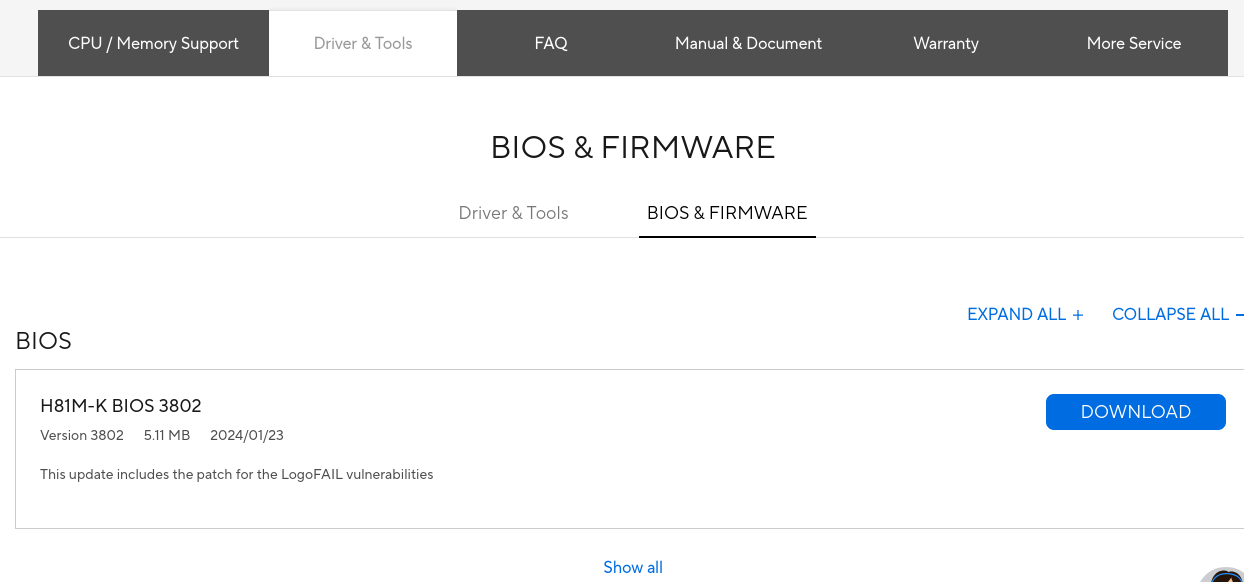
- Visit the official ASUS Download Center.
- Enter your exact motherboard model into the search bar.
- Go to the Driver & Utility section, then select the BIOS & Firmware tab.
- Download the latest BIOS version available.
- Extract the downloaded
.zipfile. You will find a.CAPfile. - Copy the
.CAPfile directly to the root directory of your FAT32-formatted USB flash drive.
# Updating Bios
- Restart your computer.
- As the system boots, repeatedly press DEL or F2 (depending on your model) to enter the BIOS menu.
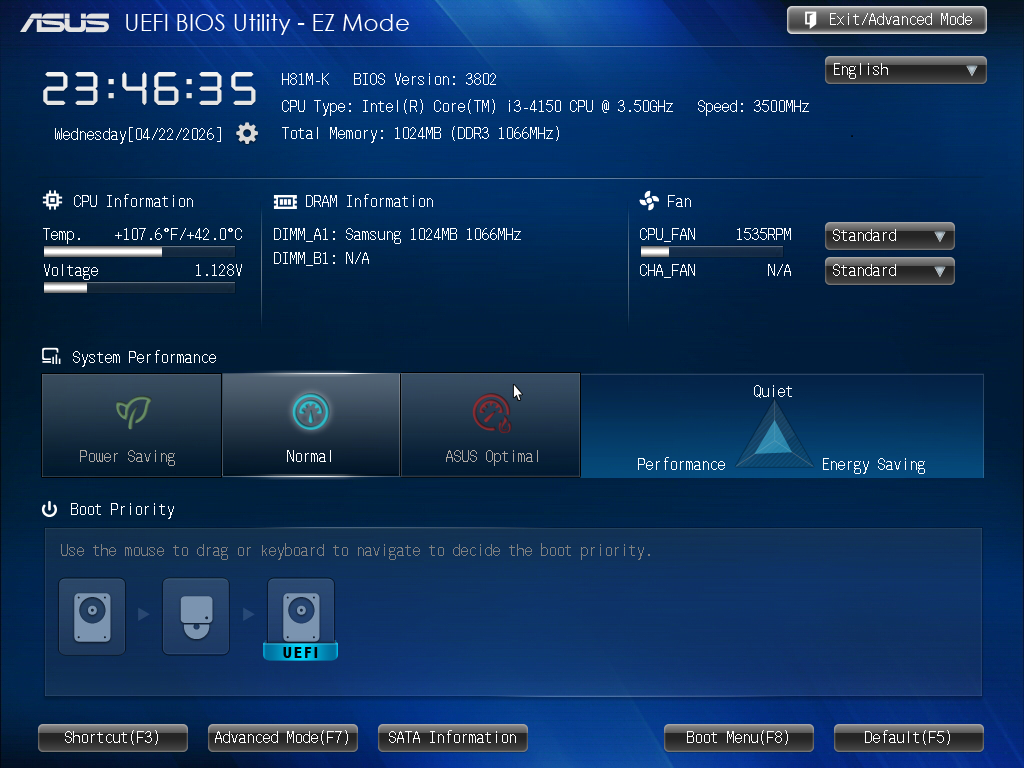
- Once inside the BIOS, press F7 to switch to Advanced Mode.
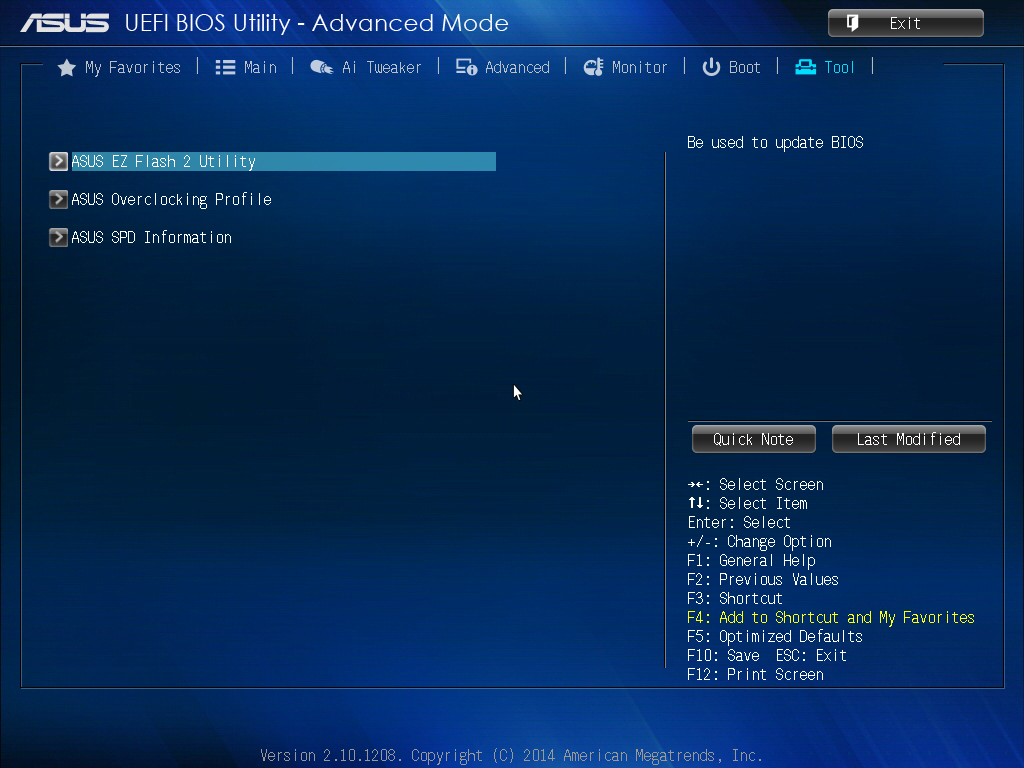
- Navigate to the Tool tab and select ASUS EZ Flash Utility, then press Enter.
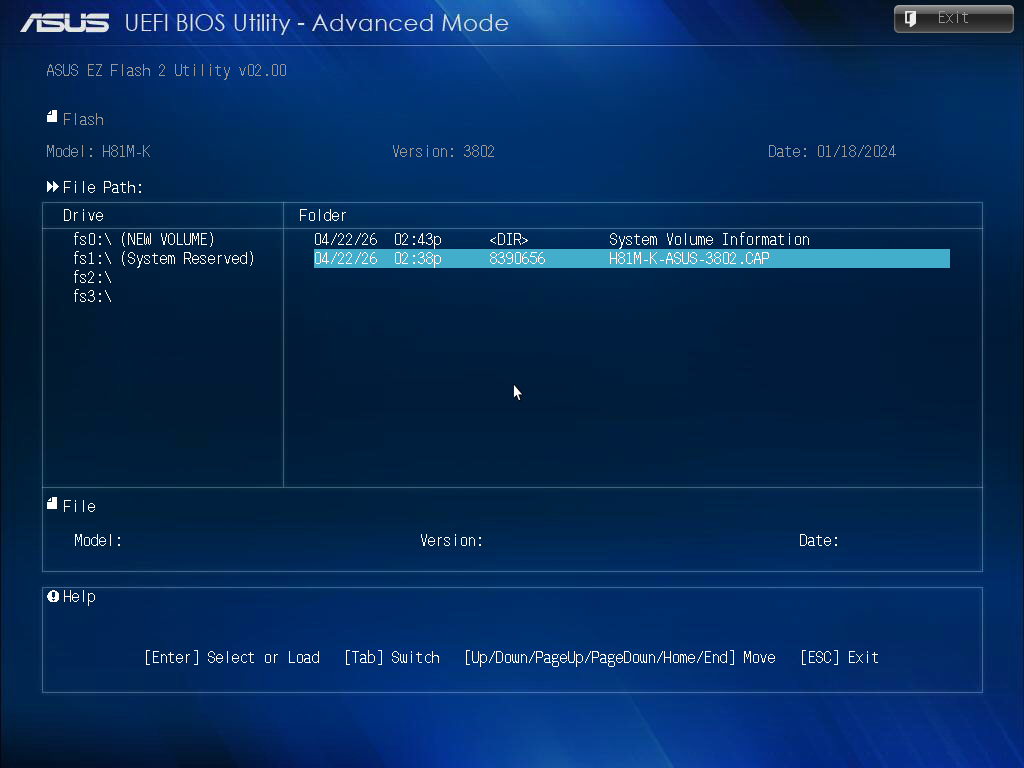
- In the EZ Flash Utility, locate your USB flash drive.
- Select the
.CAPfile you copied earlier. - Confirm the update by selecting Yes.
A progress bar will appear. Do not turn off or restart your system during this process.
- Once the update is complete, your system will restart automatically.
# After the Update
- Re-enter the BIOS menu.
- Press F5 to load Optimized Defaults (recommended for stability).
- Press F10 to Save & Exit.